How To Write A Blog Post Outline (In 6 Easy Steps)
Writing a great blog post starts with a solid outline. An outline helps you organize your thoughts, create a logical flow, and make sure you cover all the important points your readers need. This guide will show you how to create a blog post outline that works every time.
Blog post outlines save you time and help you create better content. When you plan before you write, you avoid getting stuck halfway through your post. You also make sure your ideas connect in ways that make sense to your readers.
Let's walk through the steps to create an effective blog post outline that will set you up for success.
Why You Need a Blog Post Outline
Creating a blog post outline before you start writing offers several benefits:
A good outline keeps your writing focused on your main topic. Without one, it's easy to go off on tangents that might confuse your readers.
Outlines make writing faster. When you know what points to cover and in what order, you can write without stopping to figure out what comes next.
Your content becomes more organized when you use an outline. Readers can follow your ideas more easily when they flow in a logical order.
An outline helps you spot gaps in your content before you start writing. You can make sure you're covering all the important aspects of your topic.
Elements of an Effective Blog Post Outline
The Title
Your blog post title needs to grab attention and tell readers exactly what they'll learn. Good titles often include numbers, how-to phrases, or questions.
Make your title specific. "How To Write A Blog Post Outline That Saves You Hours" works better than just "Blog Post Outlines."
Keep your title length between 50-60 characters when possible. This helps with SEO and makes sure your full title shows up in search results.
The Introduction
Your introduction section should tell readers what problem you're solving and why they should keep reading.
Start with a hook that gets readers interested. This could be a surprising fact, a question, or a common problem your readers face.
Briefly mention what you'll cover in the post. This gives readers a roadmap of what to expect.
End your introduction with a transition that leads naturally into your first main point.
Main Points
Break your topic into 3-5 main points. Each point will become a section of your blog post with its own subheading.
Arrange your main points in a logical order. You might use chronological order (first step to last), problem-to-solution order, or order of importance.
Make sure each main point directly supports your overall topic. If a point feels like a stretch, it might belong in a different blog post.
Subpoints
Under each main point, list 2-4 subpoints that add detail or explain how to accomplish that step.
Keep your subpoints balanced. Try to have a similar number of subpoints under each main section.
Your subpoints can include examples, tips, or specific instructions that help readers understand or implement your main point.
Steps To Create Your Blog Post Outline
Step 1: Choose Your Topic and Goal
Start by getting clear on what your blog post is about and what you want readers to learn or do after reading it.
Ask yourself:
-
What specific problem am I solving for readers?
-
What will readers be able to do after reading this post?
-
What makes my approach to this topic unique?
Your answers will help you focus your outline on information that truly matters to your readers.
Step 2: Research Your Topic
Good research makes your content more valuable. Look for:
Facts and statistics that support your points (but don't make them up if you can't find them).
Expert opinions that add credibility to your advice.
Common questions people have about your topic. These can be great subpoints to address.
Take notes during your research and group similar information together. These groups often become your main points.
Step 3: Create a Working Title
Write a title that clearly states what readers will learn from your post.
Your title doesn't need to be perfect at this stage. You can refine it after you finish your outline or even after you write the post.
Make sure your title includes your target keyword phrase near the beginning if possible.
Step 4: Draft Your Main Sections
Based on your research, decide on the main sections of your post. These become your H2 headings.
A typical blog post structure includes:
-
Introduction
-
4-5 Main Points (as H2 headings)
-
Conclusion
For a how-to post, your main sections might be steps in a process. For a list post, they might be categories of items in your list.
Step 5: Add Subheadings and Details
Under each main section, add H3 subheadings that break that section into smaller, more specific points.
For each subheading, jot down:
-
Key points you want to cover
-
Examples you might include
-
Transitions to the next subheading
This level of detail makes the actual writing process much faster.
Step 6: Plan Your Conclusion
Your conclusion should:
-
Summarize the main points you covered.
-
Remind readers of the benefits they'll get by following your advice.
-
Include a clear next step or call to action.
A good conclusion leaves readers feeling equipped and motivated to take action.
Common Outline Formats for Different Types of Blog Posts
How-To Posts
How-to posts work well with a step-by-step outline format:
-
Introduction (problem and promise)
-
What you'll need to complete the task
-
Step 1 with details
-
Step 2 with details
-
Continue with all steps
-
Potential problems and solutions
-
Conclusion with benefits
This format makes complex processes easy to follow.
List Posts
List posts can use this outline structure:
-
Introduction (why this list matters)
-
Category 1 of list items
-
Category 2 of list items
-
Continue with all categories
-
Conclusion with how to choose between options
List posts work well when you're comparing options or providing multiple solutions.
Informational Posts
For posts that explain concepts or provide information:
-
Introduction (introduce the topic)
-
Background and context
-
Main concept 1 with examples
-
Main concept 2 with examples
-
Applications of the information
-
Conclusion with key takeaways
This format helps readers understand complex topics and learn new information.
Tools That Help Create Blog Post Outlines
Several tools can make outline creation faster and more effective:
-
Word processors like Google Docs or Microsoft Word let you use their built-in heading styles to create an outline structure.
-
Mind mapping apps like MindMeister help you brainstorm and organize ideas visually before turning them into a linear outline.
-
Note-taking apps like Notion or Evernote make it easy to collect research and rearrange it into outline form.
The tool you choose matters less than having a system that works for you.
Tips For Outline Refinement
Check For Logical Flow
Review your outline to make sure each point leads naturally to the next. If something feels out of order, rearrange your sections.
Ask yourself if someone new to the topic would be able to follow your thought process based just on your headings.
Look for any gaps in logic where you might need to add a bridging section.
Balance Your Content
Aim for a reasonable balance in the size and depth of each section. If one section has far more subpoints than others, consider breaking it into two sections.
Your outline should reflect the relative importance of each topic. Give more space to the most important aspects of your subject.
Optimize For SEO
Include your target keyword in at least one heading. Use related keywords in your other headings and subheadings.
Make sure your headings answer questions people are likely to search for about your topic.
From Outline To Finished Post
With your outline complete, writing becomes much simpler:
Fill in each section of your outline one at a time. Don't worry about writing in order—start with whichever section feels easiest.
Use your subpoints as topic sentences or key ideas for each paragraph.
After drafting, review your post against your outline to make sure you covered everything you planned.
SEOWriting For Better Blog Outlines And Posts
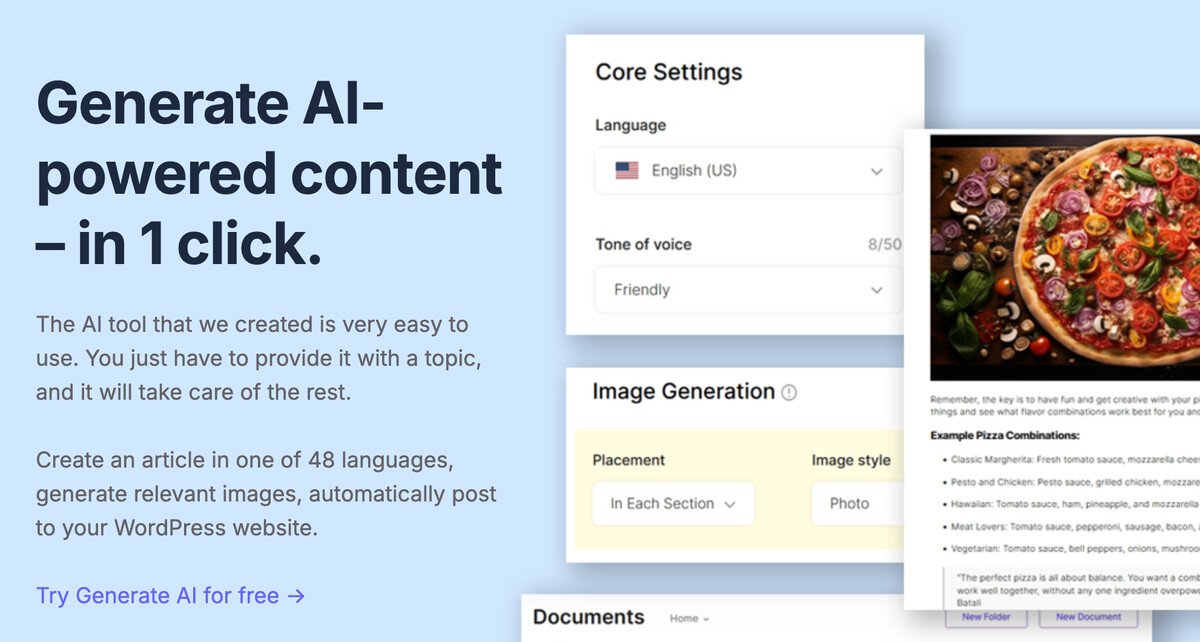
Creating effective blog post outlines requires planning and organization. Tools like SEOWriting can simplify this process while improving your results.
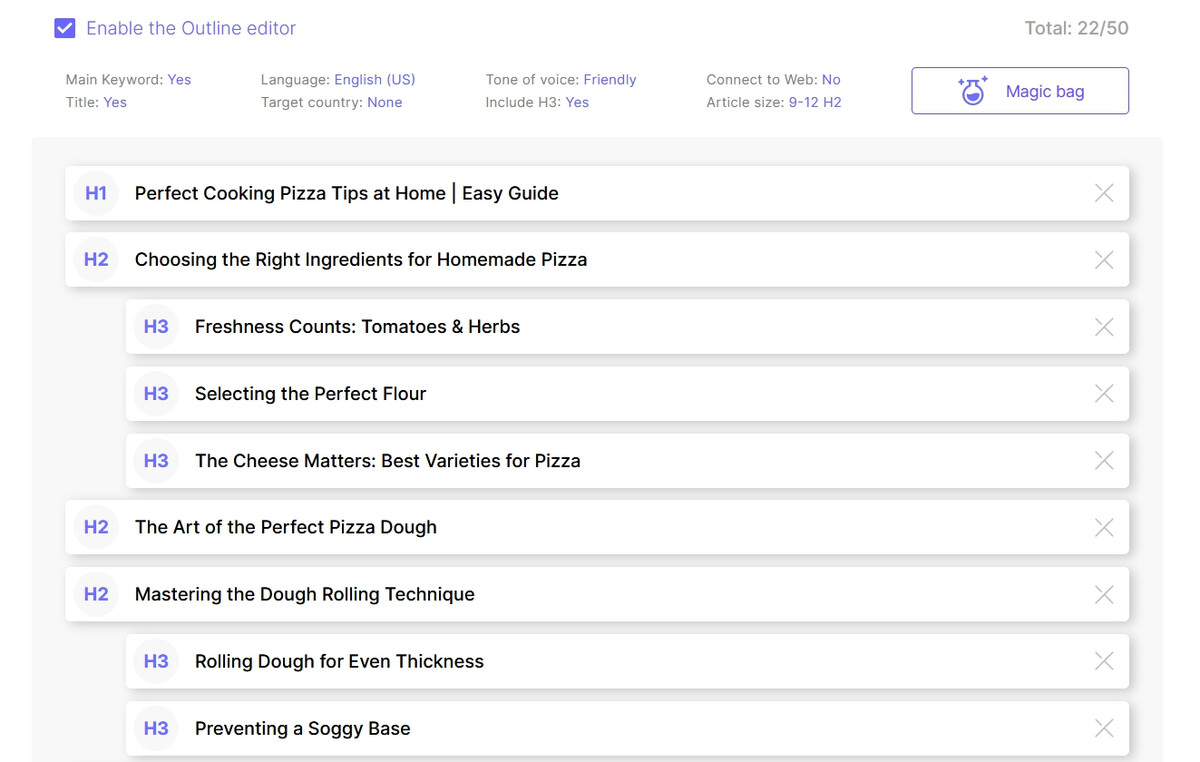
SEOWriting helps bloggers create SEO-optimized content with features designed specifically for outline creation and content development:
-
The Blog Outline Editor helps you structure your post with proper heading hierarchy
-
Built-in Deep Web Integration surfaces relevant information to include in your content.
-
NLP Keywords suggestions ensure your outline covers related topics that boost SEO
-
Readability Enhancer makes sure your outline will lead to content that's easy to understand
These features help you create outlines that lead to higher-ranking, more effective blog posts.
Final Thoughts
A well-crafted blog post outline is the foundation of effective content. By taking time to plan your post structure before writing, you create more organized, valuable content in less time.
The outline process might seem like extra work at first, but it actually saves time in the long run. With a clear roadmap to follow, you'll write faster and make fewer revisions. Your readers will also appreciate content that flows logically and answers all their questions.
If you want to create better blog outlines with less effort, try using SEOWriting. This specialized tool helps you develop SEO-optimized outlines and turn them into complete blog posts with one click. Try it for free now!


Write 10X Faster With AI-Powered Content
Create SEO-optimized articles in 15 minutes instead of 5 hours. Join 50,000+ content creators who generate content that ranks on top positions on Google. Save up to 80% of your time while getting 2X better results.
Try for Free →